Screenshot Editorial
This is a walk through of how I edited my photographs of my flat lays. I used Photoshop to edit the contrast to lighten or even darker these images, also cropping out unnecessary space or lines to even out the image. Also used clone stamp to get rid of any paper joints that was ruining the images. I edited these images to make them more professional quality, similar to those seen on retailers websites.

Before and after
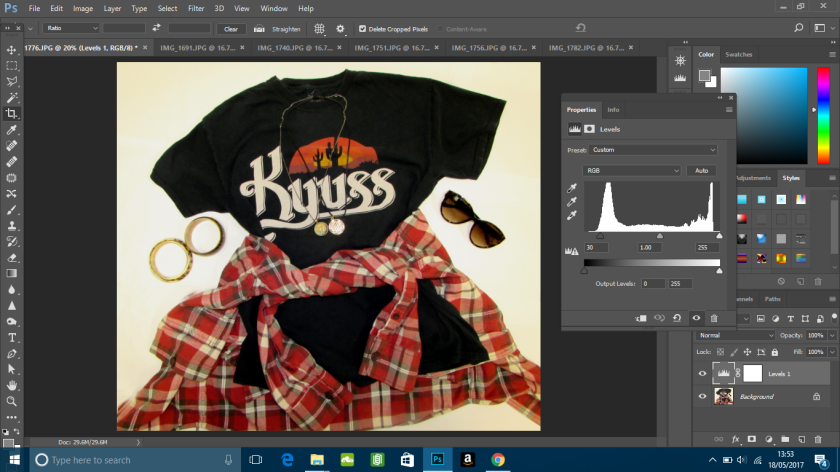
Image 1 – “Festival Grunge”
With this image on Photoshop as you can tell I cropped the size to make it evenly proportioned, also changing the levels of contrast to make the t-shirt look more darker and the colour red to pop out more. Next time I would review the colour in the original image to review when taking the image, also maybe to add more products like (shoes etc..) to make a complete look for marketing for social media or a website.
Image 2 – “French Chic”
This outfit style is a very smart look with the age range of 20 – 50 year olds. On the original image on Photoshop I only used clone stamp to get rid of of any paper joint on the image. Next time I would edit to get rid of the shadow at the bottom also get rid of the reflection on the make-up compact to show detail. The last thing I’d change would review the position on the products, especially the choker.
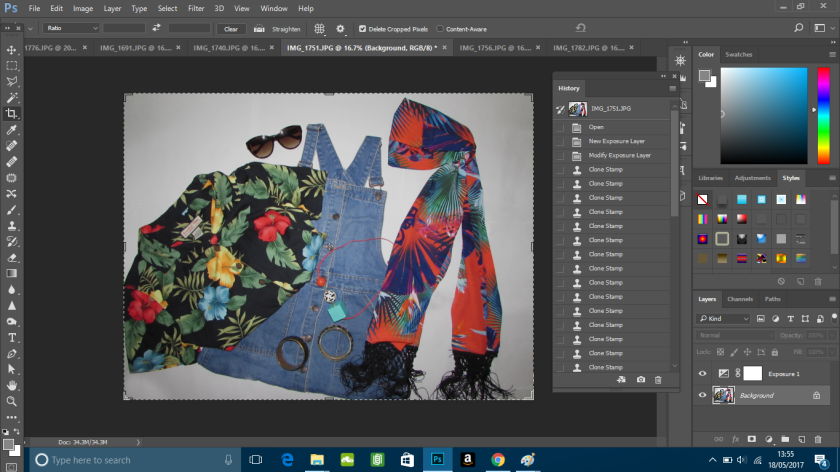
Image 3 – “Crazy Tropical”
On this outfit it is a very crazy out there style, with a lot of colourful vibrant colours. Age range for this could possibly be around 15 – 35 year olds. What I used to edit this image is clone stamp to of course get rid of again the paper joints, and also toned the lighting down. Next time I would absolutely get rid of the shadows that appear all around the image so all the background is the same shade this would defiantly make it look more professional.
Image 4 – “Dark Gothic”
This outfit I styled it has a very dark gothic themed to it, age range may be between 15 – 35 year olds. The process I used for this is that I cropped it to a suitable frame and of course again I used clone stamp to get rid of the paper joints. Next time I would do differently is laying out the clothing so you won’t be able to see the label and maybe also change the levels to make it a bit more bright so the colours can pop out more.

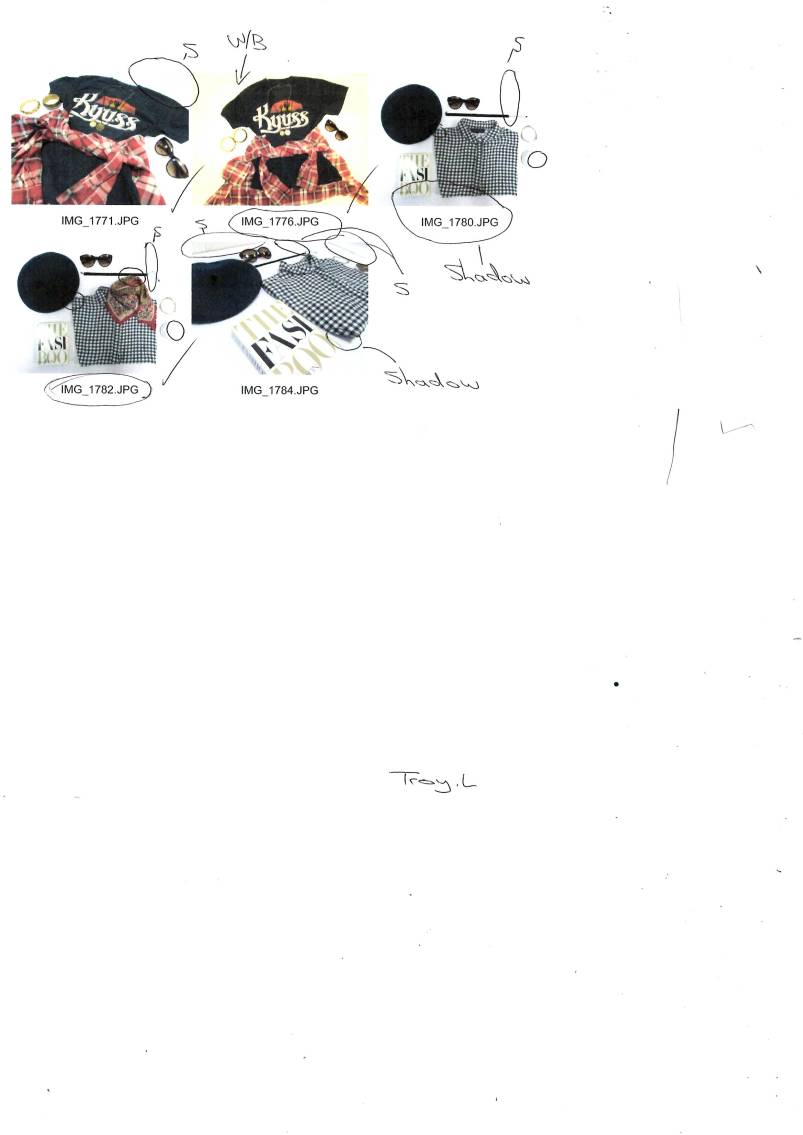
Contact Sheet
This is my Contact Sheet that I made, I printed all the photographs I’ve taken and reviewed each one what I could do to improve these next time or even what I could do differently while taking the picture even down to styling and the layout. The reason I have done this is to improve on myself when taking a photo shoot and on Photoshop aswell. After I’ve done all that I picked the main ones I really personally liked that looked more professional than the rest of the flat lays.